Rasa/Nodejs Chatbot

A simple chat bot based on Rasa NLU and developed with Node.js, Express and Socket.io as backend and HTML, CSS and Javascript with Jquery on the frontend side.
The project features a simple Rasa NLU based Chatbot developed with Node.js, Express and Socket.io as backend and HTML, CSS and Javascript with Jquery on the frontend side.
Backend
The backend side is quite simple. The server uses Socket.io for the communication between the user and the bot, everytime someone accesses the website, it will create a new socket and will immediately send out two greeting messages to the user. There are two channels, replyChannel and messageChannel, as the name says, the first one is used to manage the bot communication, it sends the bot answer and eventually receives the user’s feedback; The message channel takes care of receiving the user message and send it to Rasa for processing. You can run the backend by simply running node:
sudo node index.js
The server will then start and listen to messages on its channels:
gabryxx7@chatbot:/home/chatBot$ sudo node index.js
Chatbot is listening on port 8000!
User connected to Chatbot
Classifier Parse
Rasa Parse, message: asd
rasa: response -  200
Classifier Parse
Rasa Parse, message: what about restaurants?
rasa: response -  200
Message:  | Intent: intent name | Feedback: true
Message: What about restaurants? | Intent: restaurant_search | Feedback: false
The last lines:
Message:  | Intent: intent name | Feedback: true
Message: What about restaurants? | Intent: restaurant_search | Feedback: false
Refers to the last feature I added, which is a sort of feedback, so that the user can say whether the message he sent was correctly classified, and whether the bot replied with the correct intent.
Rasa
Rasa is installed on a Ubuntu based machine, and is currently being used with python3.5. For future references, I had some issues installing spacy + sklearn for Rasa due to some byte-compiling errors (something about the rasa examples written in hindi). In order to avoid that I downloaded the last release from the spacy repository and used sudo python3.5 -m pip install spacy-2.0.5.tar.gz to install it on the specific python version. After that I had to download the english model which did not work because it checked for spacy in the wrong pip version and would always try to install again spacy which would eventually get back to the same error. To solve this I downloaded the english model en_core_web_md-2.0.0 from the spacy repository and extracted its conttent in the spaCy folder of the python version I needed, in /usr/local/lib/python3.5/dist-packages/spacy/data/en (be sure that the __init__.py is in the en folder and can be found by spaCy). In this way, whenever something like this appears:
import spacy
spacy.load("en")
Spacy will look either for a shortlink to a en model (which can be created directly with spacy), or will look in its data folder for a en folder.
So far the only data available for training the model is the restaurant data that can be found on the Rasa NLU tutorial page. In order to train the model, you can do as suggested in the tutorial:
cd restaurantbot
sudo python3.5 -m rasa_nlu.train -c config-spacy.json
After training the model (it will take a while) you can start the rasa server with the command: sudo python3.5 -m rasa_nlu.server -c config-spacy.json YOu may also run the process in the background like this: nohup sudo python3.5 -m rasa_nlu.server -c config-spacy.json &
After the server is available you may communicate with it in three ways. Either you send a POST request from another shell on the same machine like this: curl -XPOST localhost:3100/parse -d '{"q":"I am looking for Chinese food"}' | python -mjson.tool Or you can send a request from Node, structured like this:
{
       method: 'POST',
        uri: 'http://localhost:3100/parse',
        json: true,
        body: {
            'model': modelName,
            'q': message
        }
}
Or, from the browser, you may send a request in this way: http://localhost:3100/parse?q=hello
This is what you should see on the console:
gabryxx7@chatbot:/home/chatBot/restaurantbot$ sudo python3.5 -m rasa_nlu.server -c config-spacy.json
INFO:rasa_nlu.data_router:Logging requests to '/home/chatBot/restaurantbot/logs/rasa_nlu_log-20180310-142655-20252.log'.
INFO:__main__:Started http server on port 3000
2018-03-10 14:26:55+0000 [-] Log opened.
2018-03-10 14:26:55+0000 [-] Site starting on 3000
2018-03-10 14:26:55+0000 [-] Starting factory <twisted.web.server.Site object at 0x7f785713d588>
Frontend
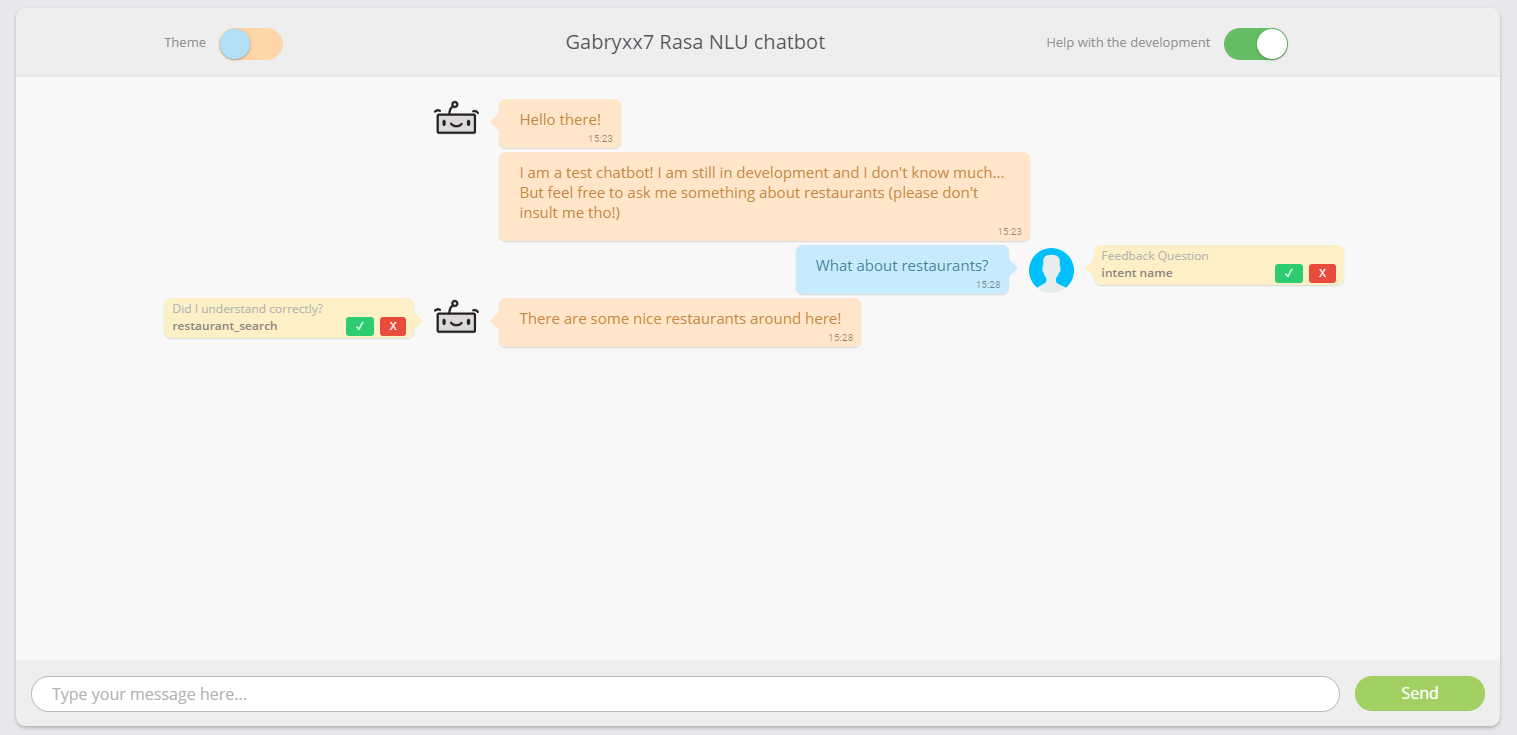
The frontend is has some more trickery, mostly to give a nice feeling to the webapp. The server will always point to the public folder and would serve the file requested in the index.html file. The HTML structure is fairly simple, I added at the end a message-template div containing the HTML code for the single message bubble. The div also contains elements regarding the feedback, which is cloned everytime the bot sends a new reply and added on the “left” of the bot’s avatar, and only shown when the “Help with the development” switch (made with switchery.js) is turned on.
The CSS is also fairly simple, maybe the trickiest part was to make an animated check mark to confirm the feedback has been sent. Besides that there are some shadows here there to give a neat look and feeling to the app.
The Javascript side chat.js is where everything happens. When the DOM is ready, socket.io is loaded and two listeners are open, waiting for messages to be received on the two channels. The function appendMessage() is the main one which creates the Message object from the newly received message and appends it to the conversation.